
Cribbing Instructions for Boom Lifts

by Scott Owyen - Director of Training On Jul 6, 2017, 07:00 AM
Subscribe To Aerial Pros
Filter by tags

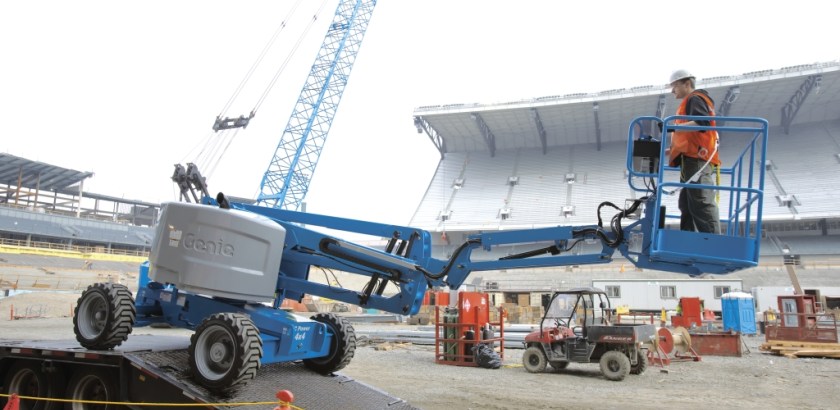
One of the most important rules when operating an aerial work platform is that it must only be elevated on a firm and level surface capable of supporting the weight of the machine. However, there are times when you may need to operate the machine in an area where the ground is not perfectly level. In some cases, site-constructed plywood cribbing may be used to bring a workplace surface to within the safe limits for aerial lift operation.
To make sure crews are working within the safe limits for aerial lift operation, Genie provides a Cribbing Instructions Manual that provides guidance on which machines are approved for cribbing, as well as proper cribbing construction and application. The manual can be downloaded at http://manuals.gogenielift.com/Operators/english/82943.pdf. Failure to read, understand and obey all warnings and instructions in this manual, and the appropriate operator’s manual for the machine being operated, will result in death or serious injury.
Use of plywood cribbing to provide a level surface for safe operation is authorized by Genie only if the following safety rules and requirements are followed:
- Do not use cribbing that is not built to the specifications outlined in the Cribbing Instructions Manual
- Operators must be trained in the safe use of aerial lifts on cribbing, using the information contained in the Cribbing Instructions Manual
- Never use cribbing on booms over 85 ft (maximum platform height)
- Do not use cribbing on any aerial equipment other than the models approved in the Cribbing Instructions Manual
- Do not use on a surface that is not firm (capable of supporting the weight of the machine without cribbing)
- Do not use on a slope greater than 6° (10%)
- Do not raise the platform unless the machine is level
- Do not drive the machine on cribbing with the platform raised
- Do not use cribbing over a hole, depression or bump in the supporting surface
- Machines must be equipped with a lock-out switch that disables the drive function when the platform is elevated. NOTE: If the machine does not have a lock-out switch, contact your Genie dealer to order a switch installation kit
- Do not raise the platform when wind speeds may exceed 15 mph

Construction Specifications – Wheeled Machines
The specifications in this section are for cribbing under machines with wheels. For machines with tracks, see the specifications in the following section:
- Cribbing is to be constructed of APA certified plywood sheets
- Each plywood sheet must be a minimum of ¾-in thick
- Each plywood sheet must be a minimum of 24 in by 24 in
- Plywood sheets must be layered together with a minimum of 24 in of overlap for joints
- Layers are to be secured with 6D ring shank nails, placed a minimum of 8 in OC edge and 12 in OC face. Use 8D ring shank nails for plywood over 1-1/8 in thick
- Each end of the cribbing is to have a ramp or a chock that extends the full width of the cribbing. The chock must be a minimum of 6 in by 6 in
- Ramps are to be constructed in a series of steps. Each step shall be a minimum of 12 in long
- The maximum total ramp height shall not exceed 8 in
- Make sure that machine wheels have a 24-in long surface to rest on when the platform is raised
- Cribbing must not be constructed to accommodate turns or curves
- Cribbing must be constructed so that no machine tire is more than 8 in off the ground at any time
- Do not drive both front and rear wheels onto the cribbing. Only one set of wheels should rest on the cribbing. The other set of wheels needs to remain on solid ground
Construction Specifications – Track Machines
- The specifications in this section are for cribbing under machines with tracks
- Cribbing is to be constructed of APA certified plywood sheets
- Each plywood sheet must be a minimum of ¾-in thick
- Each plywood sheet must be a minimum of 30 in wide by 24 in long.
- Plywood sheets must be layered together with a minimum of 24 in of overlap for joints
- Layers are to be secured with 6D ring shank nails, placed a minimum of 8 in OC edge and 12 in OC face. Use 8D ring shank nails for plywood over 1-1/8 in thick
- Each end of the cribbing is to have a ramp or a chock that extends the full width of the cribbing. The chock must be a minimum of 6 in by 6 in
- Ramps are to be constructed in a series of steps. Each step shall be a minimum of 12 in long
- The maximum total ramp height shall not exceed 8 in
- Make sure that the tracks have a 62-in long surface to rest on when the platform is raised
- Cribbing must not be constructed to accommodate turns or curves
- Cribbing must be constructed so that no track is more than 8 in off the ground at any time
- Do not drive both front and rear tracks onto the cribbing. Only one set of tracks should rest on the cribbing. The other set of tracks needs to remain on solid ground
Workplace Inspection
 Read, understand and obey the instructions and hazards in the Workplace Inspection section of the operator's manual on your machine.
Conduct a workplace inspection prior to constructing and using cribbing to determine if the site is suitable for safe machine operation.
The workplace must be inspected before each use to determine if any changes have occurred that could affect the safe operation of the machine.
Be aware of and avoid the following hazardous situations when using cribbing:
- Unstable surfaces that could shift under cribbing
- Surfaces that cannot support the cribbing (refer to the floor loading specifications in the operator's manual)
- Slippery surfaces that could cause cribbing to slide or skid
- Sloped surfaces of greater than 6°
- Drop-offs or holes
- Raised ground
Instructions for Use
- Make sure you are properly trained in the use of aerial lifts on cribbing, using the information provided in this manual.
- Make sure the Genie® aerial lift has been modified with a lock-out switch that disables the drive function. This switch will be located on the ground control panel and labeled with a patch (part number 97549).
NOTE: If the machine does not have a lock-out switch, contact your Genie dealer to order a switch installation kit. Note: Genie Z™-80/60 machines will not have a lock-out switch. Use the operating software and follow the Drive Disable Instructions to disable the drive function while lifting.
- With the machine in the stowed position, drive onto the cribbing. One set of wheels or tracks must remain on the ground.
- Be sure the base of the machine is level on the cribbing.
- Move the drive disable switch on the ground control panel to lock out the drive function (all machines except Genie Z-80/60 models).
- Operate the boom functions according to the instructions in the appropriate operator's manual.
Have questions?
If you have questions, please call the Genie Product Safety Group at 1-800-536-1800. They’re here to help keep you productive and safe on the job.
Related Posts

Tips for Operating Boom Lifts Above 100 Feet
A “Super Boom” was the nickname first given to Genie® boom lifts, breaking through the industry's vertical height ceiling.
Continue Reading
Aerial Fleet Management: Considerations for 2WD vs. 4WD Boom Lifts
Aerial equipment is among the most rented machines in your rental store’s fleet.
Continue Reading
Updated Cable Replacement Protocol for Genie® Boom Lifts
With rental equipment constantly going out and coming in, less time in the shop translates to more time out on rent.
Continue Reading